 Bookmark this on Delicious
 Recommend toStumbleUpon
I am indebted to Henry Sotheran's, Ltd., Sackville Street, London for bringing this extraordinary two volume treasure to my attention. (The longest established antiquarian booksellers in the world. Established 1761.)
I am taking the time to publish this small appreciation of the book for several reasons, and perhaps several audiences.
First, a preliminary word on what the book is about. Please bear with me, and at least skim until you get through the "Best for Last" part?
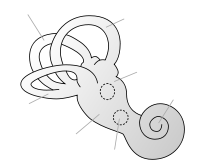
If you visit Wikipedia's entry on the inner ear, you might be forgiven for thinking that they have said rather a lot about it. They have done a good job of introducing you to the topic of Dr. Gray's book... but they have hardly scratched the surface. But, note in particular, their nice diagram of what you will find in the inner ear of a typical vertebrate. Note that I said "typical".
Dr. Gray (and, I expect, a vast army of grad students, or whatever they were called around 1900) looked at the essential tissues of the inner ear of many, many vertebrates. They created stereo-photographs of those different examples of inner ear, and put them all together in the two wonderful volumes.
This web page is a tribute to that work.
And I hope that some readers' appreciation of What A Scientist Does will be expanded.
I find the scale of the project, and the beautiful execution, which, alas, you will have to find a copy of the book to fully appreciate, inspiring.
In my collecting of old books, I frequently find the phrase "We don't know we are born" passing through my mind. I think it is good to be reminded of that fact.
Today, no doubt the encyclopedia of inner ears could be compiled with the help of CAT scans, or similar. And we could put the images in a CAD system, and students of the inner ear could look at the canals, cochlea, etc, with a fancy computer terminal which would allow the student to change point of view, etc.
But Dr. Gray didn't have those advantages. Any yet he still produced the book, with the best technology available in his time for seeing 3D structures in a 2D medium... the stereo-photograph.
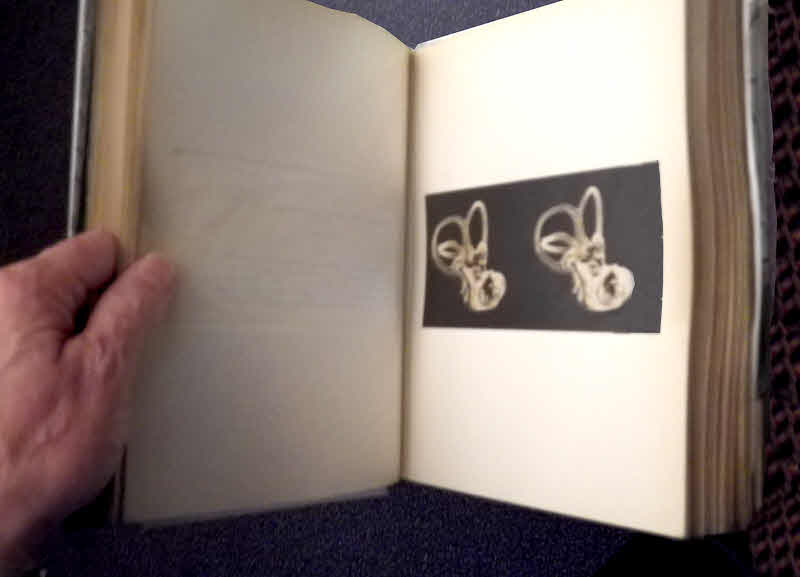
Don't be fooled by the photo to the left... most of the book is text. But for each of the many vertebrates discussed, there is a page like the one in the photo. With a small pair of lenses a bit like spectacles, when you have the knack, you can "see" three dimensions when you look at the photos in the book.
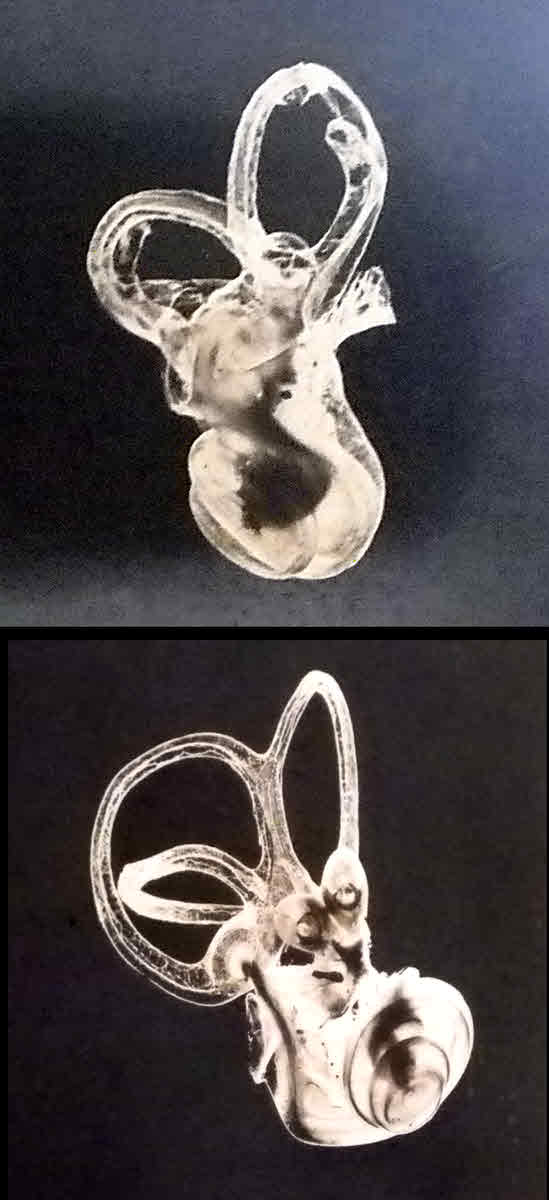
Here are two samples of "half" of two stereo-photos. I am afraid that I failed to make a note as to which animals these examples come from.
I hope you have already felt that looking at this web page has given you some reward.
But when you consider the next point, I hope you will be particularly amazed.
In the images, you see three loops, a snail like structure, and various other bits and pieces.
All of these things, inside the animal they came from, were soft tissue, and very delicate.
And they were encased in a bone "cocoon", which protected them.
And in many cases, they were tiny. In a shark about 40cm long, nose to tip of tail, they loops are probably 8mm in diameter. (I know... I've dissected them out. In a shark it is relatively easy, because the "bone" cocoon, in the case of a shark, is made of mere cartilage.
But opening up the "cocoon", so that you can see the loops and the "snail" is one thing. Totally excising the structures, and photographing them, so beautifully, is quite another matter.
That will suffice, for some readers, I suspect. Thank you for reading this far!
For other readers, I have a bit more.
As a scientific study, the encyclopedia would have been incomplete if the way the people who made it extracted and prepared the tissues for the photographs was not explained. (Get past the "taking stereo pairs", if you are reading still.)
Taking stereo pairs, by the way, is not rocket science. You can take satisfactory pairs with your cell phone if, like so many, it has a camera, can make the tea, walk the dog, etc. Hold it up. Go "snap". Move it 20cm to the right. Go "snap". You're done. Some scenes work better than others. If there was much movement of things in the scene between the two "snaps", that will degrade the result.
The trick is arranging prints of the right size, well mounted, and the "thing a bit like spectacles" for viewing them. There are many web pages out there where you can get help. It's fun... try it!
But back to the biology.
I have created a separate web page with an image of four pages from This page is all about a small part of Dr. Gray's magnificent opus. (Pages 8-11). That link will open in a new tab (or maybe a new window) if you click on the link. I suggest that you right-click on the link, and expressly request "Open in New Window". Then rearrange things until you can read these notes and Dr. Gray's text side-by-side.
The four pages I have made available to you describe how you can prepare the inner ear tissues for photography... assuming you have "caught your rabbit", of course. I.e. that you have the head of a relatively recently killed vertebrate. A sheep would be a good one to start with. A mouse's inner ear is going to be awfully small. (I will try to present a list of the vertebrates Dr. Gray included. One has to marvel at the range of specimens he managed to put his hands (and scalpel) on.
Your problem, Jim, should you decide to accept the assignment, is a bit like getting the meat out of a walnut, undisturbed.
Here is Dr. Gray's "recipe". Read the following in conjunction with his more complete notes. Imagine actually doing all of this with enough vertebrates to fill two volumes. And this is just the "preparation" stage... Once you have the prepared specimen, you still have to photograph it, and write the text which will go with it.
"membranous labyrinth" refers to the "stuff" shown in the Wikipedia diagram at the top of this page
"temporal bone" (that's a bit from the skull).... "as soon after death as possible" (don't let your imagination dwell on that phrase too long!)... "and all superfluous bone should be removed" (i.e., trim it down... but as you are dealing with bone, you may find this a bit of a chore. Especially as you must not disturb delicate things inside the bony "cocoon".
"Stapes should be extracted". Tes, well. The stapes is the smallest bone in the body, and is the one you come to after removing the eardrum and the two bones connecting vibrations from that to the stapes, which passes them on to the inner ear. Easy to say "extract the stapes". Getting it out without doing any damage to the delicate things it connects to won't be so easy.
Formalin is a foul smelling liquid much beloved of the biology technicians... their proper name is on the tip of my tongue... who take biological samples (prefereably fresh, but studies are also made of putrefaction... but not by me, I'm glad to say) and transform them for study. The need is to arrest putrefaction, but without so changing the sample you want to study that you can no longer learn anything about what is was like when still part of a living organism. Besides preventing putrefaction, you often want to change the consistency of tissue, to make it hold its shape, or at least make it easy to slice. The process is known as "fixing".
I said formalin was foul smelling. I haven't actually smelt it for at least 20 years, as far as I can recall. And yet, a few minutes after writing the above, I "smelt" it again, the memories are so firmly entrenched.
"After being in the fluid for three days..." Start, if you will, keeping track of how long it takes to prepare one of the specimens Dr. Gray put in his book.
I should perhaps mention that in that follows, you can assume that the liquids involved are able to reach the inner parts of the "cocoon". My "exract the meat from a walnut" analogy breaks down in that respect. Imagine a walnut with a few holes drilled in the shell!
"...put in 70% alcohol... put in absolulte (100%) alchohol". Here, and in other places, you will find the tissue being moved between ever stronger concentrations of different liquids. Here we are drawing water out of the tissue... it will pass out because of osmosis. The water is leaving the tissue, and alcohol will pass in, in an attempt to get the alcohol concentrations inside and outside the tissue the same. The tissue goes in 70% alcohol first to start the process gently, and because absolute alcohol is expensive. There's no point in "watering it down" with tissue that hasn't already been partly "dried" (partly had it's water removed), when 70% alcohol can start the process just as well.
"Fourteen days... alcohol changed..." As the alcohol does its job, it begins to have some water in it. At the end we want only alcohol in and around the tissue.
"... from alcohol to ether/ alcohol". Having gone from the stink of formalin, now we go on to the dangers of ether. It does at least smell nice. Besides having to be careful of your medical health around ether, you also are at risk of fires or explosions. That exists whenever you have ether or alcohol around. Furthermore, alcohol and ether sometimes form peroxides, and if there is peroxide in the mixture, then when it dries it is even more prone to explode.
So... we have the tissues awash with alcohol and ether. This was in preparation of infusing some celloidin into them. It helps stiffen the tissues at the end of the day.
"... great importance to ensure that there is no escape of ether or alcohol..." The former is especially volatile, so vigilance will be necessary. As the two liquids evaporate at different rates, it would have taken considerable care to ensure that the composition of the liquid around the tissue maintained the required proportions of the two.
"... xylol... two or three weeks..." Xylol is another nasty liquid. Flammable, toxic... but a very good solvent!
The alcohol immersion replaced the water in the tissues. The ether helped to infuse them with the colloidin. The reason for the xylol will be explained in a moment, but what you need to know for now is that alcohol, ether and xylol are miscible... they dissolve into one another. Whereas water and xylol (and ether) are NOT miscible. We can go from alcohol soaked tissue to xylol soaked tissue, and that is what Dr. Gray's instructions are calling for. But each change of liquid takes time, as leaching the old liquid out of the tissues is a slow process, and the liquid you are bathing the tissues in has to be changed from time to time as it becomes contaminated with the previous liquid, as that comes out... as we want... of the tissue.
Rush the "change liquids" process, and you are left with tissue with an unacceptably high level of the previous liquid left behind. And of course, it is an art and a craft to know how long is long enough, how many changes of liquid are needed, etc. If you were preparing the tissues from the inner ear of a shrew, you would have an easier job... in some respects... than if you were preparing the inner ear of an elephant.
".. bone is next transferred to paraffin..."
Now... depending on where you are in the world, paraffin can mean many things. Here we are talking of something like candle wax. And by "bone", the author means all of what he took from the animal whose inner ear he wanted to study. The "walnut", in my analogy.
When the "bone" is transferred to the paraffin, the author expects you to know that you are dealing with melted paraffin. Xylol and melted paraffin are miscible. And xylol dissolves solid paraffin. Two facts which will prove useful before we are through.
While the tissue languishes in the melted candle wax, the xylol present will gradually evaporate away. (Proper provision would have to be made, today, to keep the fumes from bothering people or creating unsafe situations. Not an entirely trivial exercise, but the xylol needs to evaporate. As it leaves, melted candle wax takes its place in the tissue. The reason the paraffin is changed several times is to aid in the removal of all the xylol.
Are you beginning to see the extraordinary amount of work went into the creation of Dr. Gray's book?
So. Next the paraffin is allowed to freeze, and then all of the wax on the outside of the "walnut" is scraped away.
"...bone is transferred to the acid bath..."
We have delicate tissues, inside a ball of wax, inside a shell of bone. The acid will destroy the bone, but the wax will keep the acid off of the tissues.
And finally we reach the home stretch! Basically, what's left is to use xylol to dissolve away the wax which protected the parts we wanted to save while the acid destoryed the bone we wanted to get rid of. I hope that everything else needs no explanation, but do continue to keep your eye on how much skill and care even the remaining steps require. Then think about how much skill and care (and how many days) went into each of the many preparations made for Dr. Gray's book. I wonder if any of the preparations he made are still cared for in a museum somewhere? I hope so, don't you?
The techniques described for preparing the inner ear tissues for photographing were not created exclusively for this project.
Dr. Gray clearly experimented, and tweaked, but the general techniques are widely used to prepare tissue for examination under a microscope. As with Dr. Gray's work, the tissue is embedded in frozen wax. At that stage, thin slices are made, the slices affixed to a microscope slide, and then the wax is dissolved away with xylol.
Forgive the abrupt finish? One day, I will try to come back, add a few further remarks, but there isn't time for that just now, sorry. I hope you found the material of interest. Maybe email and say "more like that", if so?
Search across all my sites with the Google search button which I have provided at the top left on the page to which the link will take you.
Or...
Search just this site without using forms,
Or... again to search just this site, use...
The search engine merely looks for the words you type, so....
*! Spell them properly !*
Don't bother with "How do I get rich?" That will merely return pages with "how", "do", "I", "get" and "rich".
This page's editor, Tom Boyd, will be pleased if you get in touch by email.
![]() Page tested for compliance with INDUSTRY (not MS-only) standards, using the free, publicly accessible validator at validator.w3.org. Mostly passes. There were two "unknown attributes" in Google+ button code. Sigh.
Page tested for compliance with INDUSTRY (not MS-only) standards, using the free, publicly accessible validator at validator.w3.org. Mostly passes. There were two "unknown attributes" in Google+ button code. Sigh.